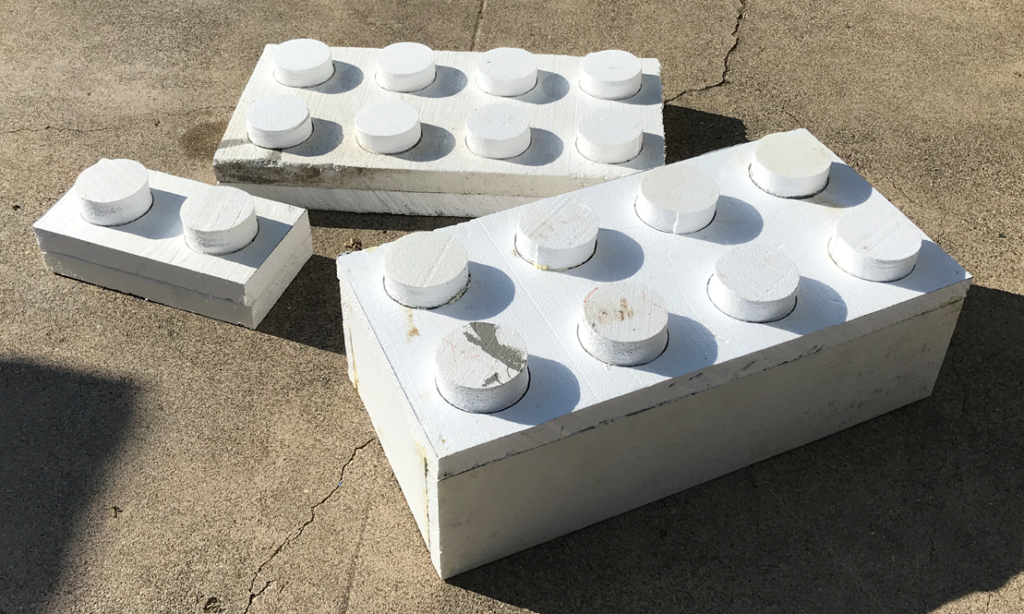


In order to create larger than life sized Legos, I decided to use Styrofoam to build them, utilizing some of the things I learned last year.
After establishing the Lego to yard size ratio, I began to lay out plans for the bricks.
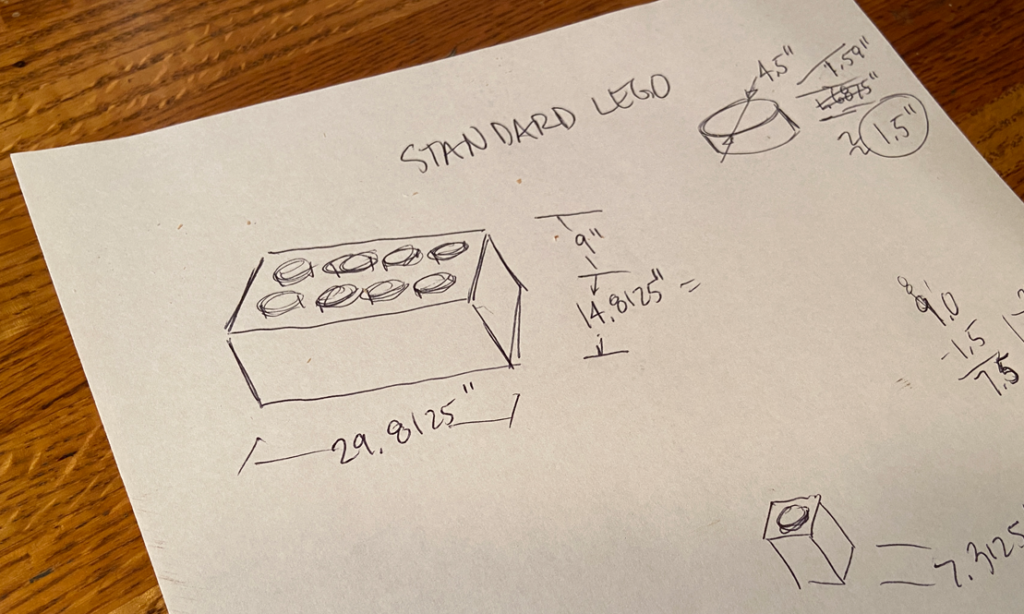
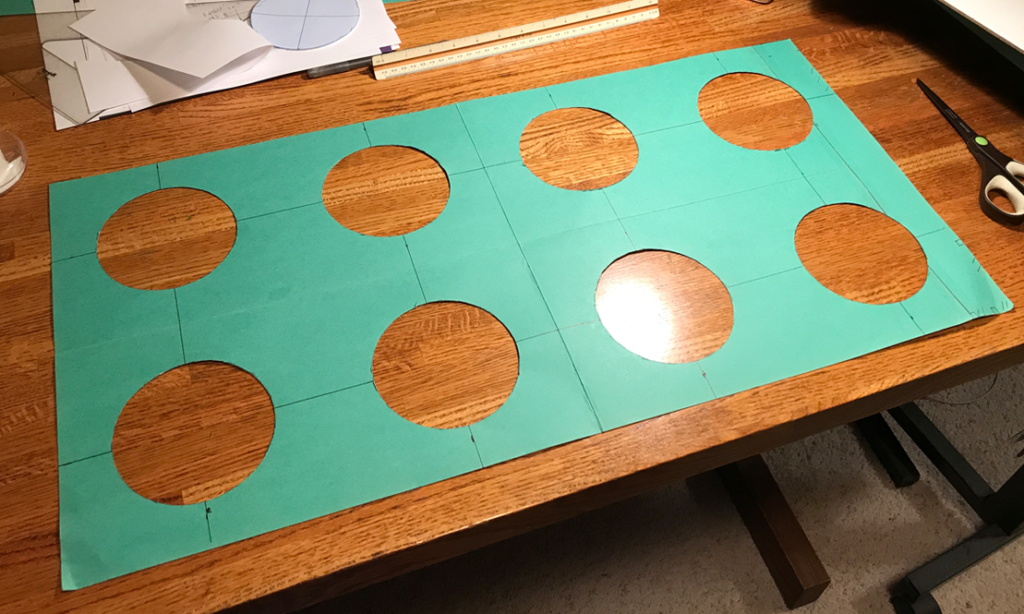
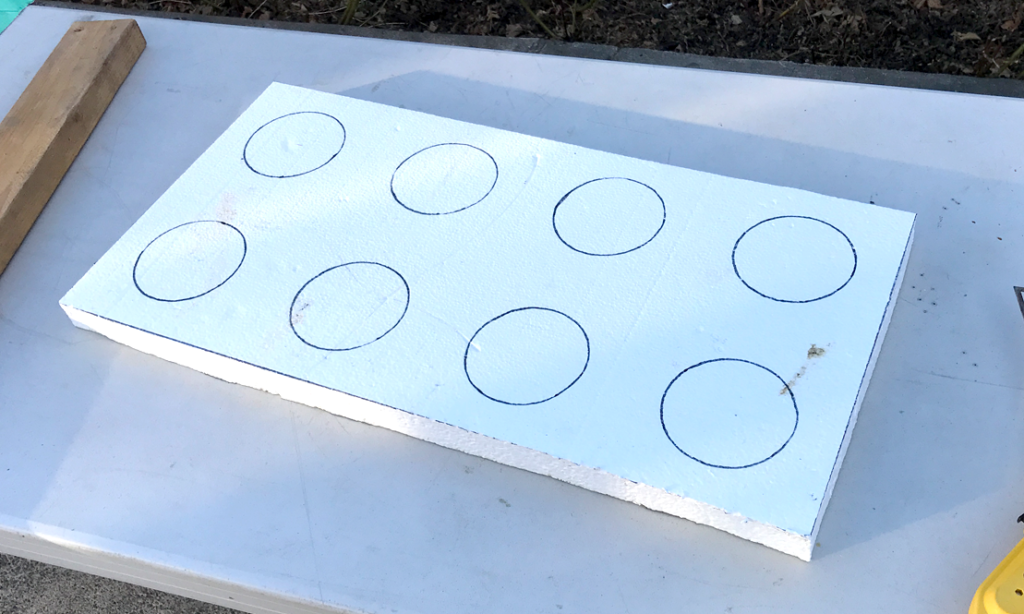
I then created a template out of poster board for a standard Lego piece (2 studs by 4 studs), which I could use to help me transfer the dimensions on to the Styrofoam quickly.
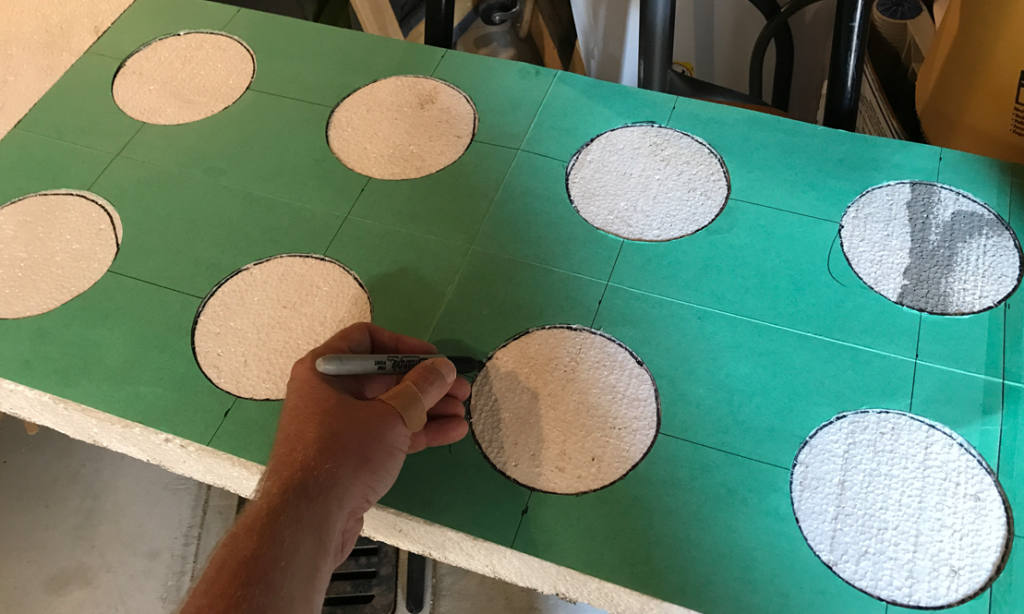
From there, I used my hot knife to cut out the foam. After working on a variety of ways to get straight, perpendicular cuts, I arrived at using a 2X4 piece of lumber as the straight (and perpendicular) edge.
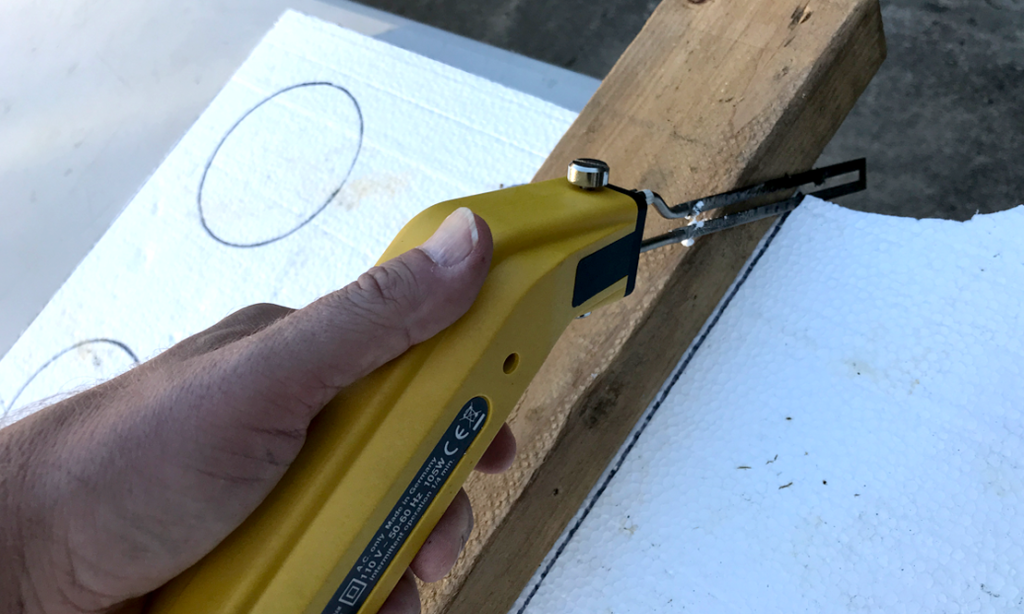
This allowed me to cut out straight-sided Lego pieces.
From there I used Great Stuff to glue on the bottom piece as well as the cylindrical studs (see the Studmaker blog post for more info about that process).
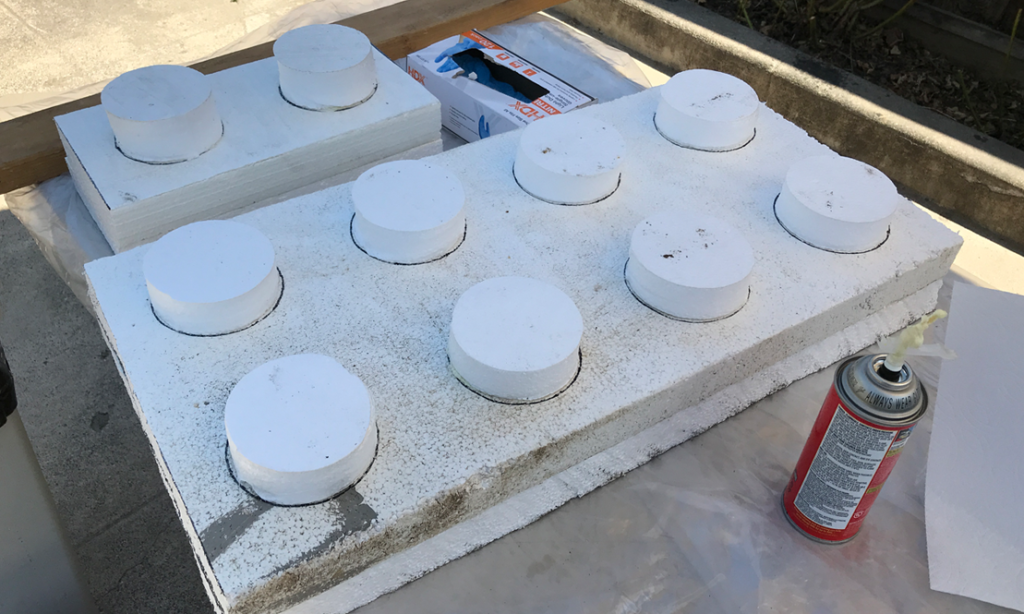
Once it was dry, I had my first set of full-sized Legos!